
13 Metal Garage Upgrades Worth Considering—and When to Skip Them

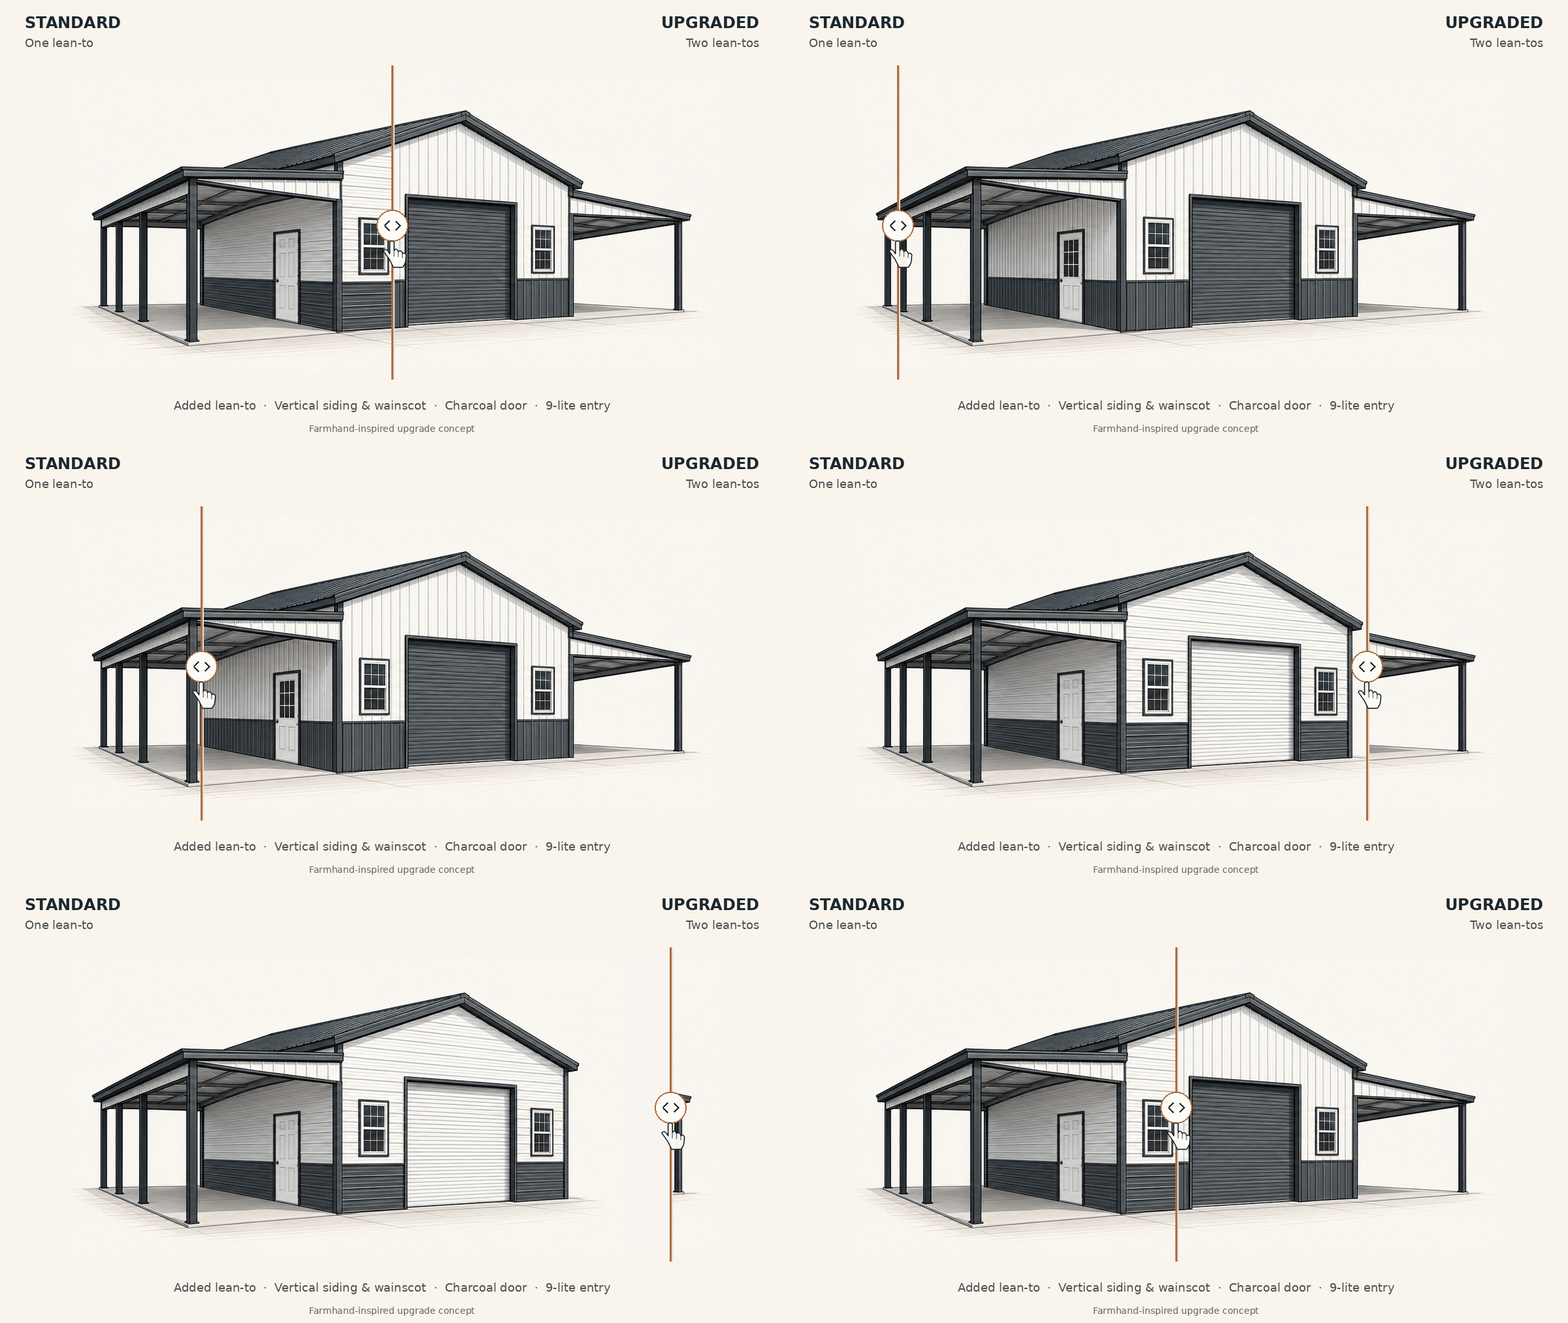
A useful garage starts with the work it needs to do: park your truck, protect your tools, give you room to build something, or handle all three. The right upgrades make those jobs easier. Others improve how the building looks beside your home or prepare it for future interior finishing.
Our suggested approach is to solve space and access first, confirm the required structural package, and then compare comfort, finish details, and appearance. These 13 concepts help you weigh those choices. Some work especially well together—for example, 4-foot frame spacing, vertical siding, and a planned interior finish.
Before treating anything as optional, have the building requirements for your location and intended use confirmed. Required engineering and anchoring belong in the baseline quote. Available upgrades and construction details vary by manufacturer and building configuration.
Compare the options at a glance
Upgrade | Main reason to consider it |
|---|---|
More area | Keep parking, storage, and work space from competing |
Additional height | Accommodate taller openings, vehicles, or planned equipment |
A lean-to | Add open covered space beside the enclosed garage |
A steeper roof pitch | Create proportions that feel more residential |
Larger roll-up openings | Make vehicle and trailer access more comfortable |
Colored roll-up doors | Coordinate large door surfaces with the exterior palette |
Different walk-in door types | Improve daylight, appearance, and the entrance detail |
Vertical siding and horizontal girts | Change the look and add space behind the panels |
4-foot-on-center framing | Better coordinate with common construction materials |
Heavier-gauge framing | Compare the structural package for your project |
Heavier-gauge panels | Consider additional resistance to dents and everyday impacts |
Insulation or condensation control | Address a defined moisture or comfort goal |
Color-matched screws | Reduce the contrast of exposed fastener heads |
1. Extra width or length
Consider it if: your garage needs to hold more than the vehicles. Shelves, a compressor, a mower, and a workbench can consume the space you imagined using to open doors or walk around a truck.
Measure the complete vehicle and draw in the other items at their actual depths. Include space to open drawers, carry tools, and reach storage while everything is parked. Extra width and extra length solve different problems: width can separate work from parking; length can create storage or work space behind a vehicle.
You may be able to skip it if: the measured layout already works and the larger footprint would consume money needed for the foundation or access. Choose a specific use for added space before buying it.
2. Additional building height
Consider it if: you have a taller vehicle, want a taller opening, or are planning equipment with overhead clearance requirements.
Ask for the required clear opening and usable interior clearances. Leg height, peak height, door height, and clearance below structural members describe different things. A taller wall by itself does not establish that a lift or tall vehicle will work.
You may be able to skip it if: your actual uses fit the confirmed clearances. More height should solve an identified need, especially if it changes the cost of walls, doors, or the required structural package.
3. A lean-to for additional covered space
Consider it if: some items need overhead cover while others need full enclosure. A lean-to can give mowers, implements, firewood, or other suitable outdoor equipment a place beside the garage without using an enclosed parking bay.
It can also create a covered work area or sheltered approach, depending on the design. Decide how you will use it before choosing its width, height, and location.
Check the usable openings between posts, clearance along the roof's lower edge, and the route needed to move equipment underneath. The main building's height and the lean-to roof slope affect the resulting space. Roof coverage is different from an unobstructed clear opening.
Compare the full garage-and-lean-to package with a wider enclosed garage. An open lean-to provides different weather protection and security, so the better value depends on what you intend to store.
You may be able to skip it if: everything needs secure enclosure, or the addition would consume the driveway and turning space you need. If you may add one later, discuss that now; a future addition still needs compatible framing, site space, and an approved connection design.
4. A steeper roof pitch
Consider it if: you want the garage to feel more residential or coordinate more closely with your home's roof proportions. A steeper pitch can give the roof greater visual presence and change the overall silhouette.
Roof pitch describes the rise over a horizontal run. For example, 3:12 means the roof rises 3 inches for every 12 inches horizontally. Ask which pitch upgrades are available for your building rather than assuming every slope can be selected.
Compare the same building at the same wall height and viewing angle. Then review the total height and itemized price. A pitch change affects the roof geometry and needs to be included in the complete engineered design.
You may be able to skip it if: you prefer the standard profile or would rather put the difference toward usable space. A taller roof peak also does not automatically increase clearance below every interior structural member.
5. Larger roll-up door openings
Consider it if: you back a trailer inside, drive a wide truck, or approach the door at an angle. Check mirrors, roof accessories, the trailer load, and the space needed to line up outside.
Ask us to confirm the finished clear opening and the door arrangement included in the quote. A label on a drawing should not replace that confirmation.
You may be able to skip it if: your existing opening choice gives you a comfortable approach and clearance. A larger opening can also change the framing and available wall space, so compare the complete layout.
6. Colored roll-up doors
Consider it if: the roll-up doors occupy a large part of the front wall and you want them to coordinate with the siding, trim, or roof. A darker door can blend into a dark exterior; a contrasting door can become a deliberate accent.
A useful planning allowance is approximately $150–$200 additional per door for a color upgrade. Two upgraded doors would add roughly $300–$400 using that allowance. Confirm the actual price and available colors for the door size and manufacturer in your quote.
Compare the door color on the complete building. A manufacturer color with a similar name may not exactly match the wall panels.
You may be able to skip it if: you like the standard door color or want the doors to contrast with the walls. This is primarily an appearance decision, so judge its value against the other upgrades competing for your budget.
7. Walk-in door styles and a better threshold detail
Consider it if: the walk-in door will be your everyday entrance or you want a more finished appearance beside the house. Door construction, glazing, and the threshold deserve separate attention.
Standard hollow-metal doors
Standard walk-in doors in this building category are commonly hollow-metal units. They can provide a straightforward entrance for a storage garage or utility building.
“Hollow-metal” describes the construction; it does not establish the insulation inside. Door cores vary, as the Steel Door Institute's guidance explains. Ask about the actual core, frame, weatherstripping, hardware, and finish included in the quoted door.
A plain door may be a sensible choice when privacy and a simple utility entrance matter more than daylight or a residential appearance.
Doors with windows, including 9-lite options
A 9-lite door typically has a glazed area divided visually into nine sections. It can bring daylight into the entrance and give the building a more residential look. The divisions may be a grille within or over a larger glass unit, depending on the product.
Consider how the glass affects privacy and visibility into the garage. Confirm the glazing, door construction, available finish, and included hardware. A windowed door is a style option, not a guarantee of a particular insulation or security rating.
Wood or residential-style doors with a true threshold
Wood doors and other available residential-style door assemblies can offer a different entrance detail, including a door that closes flush against its intended threshold or sill.
In many standard tube-steel building entrances, the base rail continues across the doorway and serves as the threshold you step over. A dedicated door-and-sill assembly can give you a more conventional residential-style transition instead. The improvement comes from the complete door, frame, and threshold arrangement—not from wood alone.
Ask to see the actual threshold detail and confirm the step-over height relative to the slab and exterior approach. A true threshold is not automatically a zero-step or accessible entrance. Wood also needs an appropriate exterior finish and ongoing care.
Coordinate the doorway with the building supplier and concrete contractor before construction. Any base-rail interruption or modification must be part of the approved detail; it should not be improvised after installation.
Choose the door and its location together
Put the entrance on the route you actually walk from the house, driveway, or yard. Check the door swing against parked vehicles, shelves, and outdoor paths.
You may be able to skip a door upgrade if: the standard unit meets your needs and you are comfortable with its threshold arrangement. Before ordering, compare the whole assembly, including daylight, privacy, core, hardware, weather seals, threshold, and installation scope.
8. Vertical siding with horizontal girts
Consider it if: you prefer the upright lines of vertical wall panels or want to plan for thicker insulation products behind the siding.
Vertical siding requires horizontal attachment members. In many tube-steel packages, these are hat channels used as horizontal wall girts. They provide attachment points for the panels and hold the siding farther out from the framing legs.
That added depth can be useful when planning thicker insulation products, because there is more room between the framing legs and the siding than in a detail with panels fastened directly against the legs. Confirm the channel depth, available cavity, and insulation installation method for the actual package.
This is a practical reason to discuss the wall assembly before choosing insulation. Extra space by itself does not establish an R-value, and the steel members still create thermal bridges. Gaps, compression, air sealing, and moisture control remain part of the assembly.
You may be able to skip it if: you prefer horizontal walls and your planned insulation or interior finish works with that system. Compare complete assemblies and itemized prices. Specify wall direction separately from roof direction in the quote.
9. 4-foot-on-center framing for future finishing
Consider it if: you plan to line the interior, install conventional sheet materials, or build out a more finished workshop.
“On center” means the distance from the center of one frame to the center of the next. Moving from a typical 5-foot spacing to 4-foot spacing can coordinate better with common 4-by-8-foot construction sheets and conventional material layouts.
For example, an 8-foot-long sheet running horizontally can align its ends with framing centers spaced 4 feet apart. A 5-foot layout does not follow that same sheet module, so the finishing plan may need different cuts or additional support.
This compatibility can make 4-foot framing worth discussing even when the standard engineered frame spacing meets the structural requirements. It is a planning advantage for the interior work you expect to do.
The tube frames are not conventional wood studs. Sheet orientation, edge support, intermediate backing, approved fasteners, and the finish material's permitted spans still need a suitable design. Four-foot spacing does not automatically make drywall, plywood, or every insulation product ready for direct attachment.
You may be able to skip it if: the building will remain an unfinished storage space and the standard approved layout suits your use. If finishing is likely, compare the framing upgrade now with the later work needed to adapt the interior.
10. Heavier-gauge structural framing
Consider it if: the project requires a different framing package or you want to compare an available heavier-gauge option, such as 12-gauge framing instead of 14-gauge.
Within comparable steel products, the lower gauge number denotes thicker steel. Ask which members change and what engineering applies to the complete building.
Framing gauge and frame spacing are separate specifications; write both into the quote.
You may be able to skip an optional gauge upgrade if: the standard engineered package meets the confirmed requirements and your priorities do not justify the additional cost. Gauge alone does not establish the capacity of the completed building, and required structural provisions are never optional savings.
11. Heavier-gauge roof or wall panels
Consider it if: you want to compare thicker steel panels for additional resistance to denting and everyday impacts. Roof panels deserve particular attention where hail or falling objects are a concern.
For example, a garage near a walnut tree may receive repeated impacts from falling nuts. A heavier roof panel can be worth comparing with the standard panel for that exposure. A location with frequent hail is another reason to discuss the actual roofing product and its tested performance.
Panel gauge is separate from framing gauge. Upgrading the tubes does not automatically upgrade the roof or wall sheets. Ask whether the heavier panel option applies to the roof, walls, or both, and compare the actual panel thickness, profile, coating, and support arrangement.
Thicker panels can still dent. A gauge number is not a tested hail-resistance classification, and an impact rating is not a promise of a dent-free roof. IBHS explains that impact-resistant metal roofing can still sustain cosmetic indentations.
You may be able to skip it if: the standard panel suits your exposure, use, and budget. Review the specific product and warranty rather than assuming every heavier panel delivers the same impact performance.
12. Insulation or condensation control matched to the use
Consider it if: you are planning a conditioned workshop, spending regular time inside, or addressing a defined moisture concern. Explain the goal before choosing a product.
Ask what the proposed assembly does, which surfaces are included, and what else is needed. A product intended mainly for condensation control should not be assumed to deliver the same thermal performance as a complete insulated assembly.
Plan the insulation alongside frame spacing, horizontal girts, available cavity depth, and any interior lining. Hat channels behind vertical siding can create useful additional space, while 4-foot frame spacing can better coordinate with common sheet materials used in a finishing plan.
The insulation still needs to fit its intended installation detail. The Building America Solution Center explains that compression and gaps can reduce installed performance. Forcing a thicker product into an undersized space is not the same as achieving its rated performance.
You may be able to skip a more extensive system if: your storage use does not justify it. Make the decision early enough to understand installation access, moisture control, and future finishing plans.
13. Color-matched screws
Consider it if: you want a cleaner-looking exterior, especially with dark siding or a simple color palette. Standard galvanized screw heads can stand out as rows of bright dots across the wall.
Color-matched fastener heads reduce that contrast and help the panels read as a more continuous surface. It is a small detail worth comparing on a large wall where many exposed fasteners are visible.
Ask whether matching screws are included or optional, which roof and wall surfaces receive them, and whether different panel colors need different fastener finishes. The fasteners still need the correct coating, washers, and specifications for the panel system.
You may be able to skip it if: the contrast does not bother you or the fasteners are visually unobtrusive on your chosen colors. Compare close-up examples before deciding; this detail is easier to notice in person than in a distant building photo.
Choose upgrades that work together
Start with a version that meets your space, access, and location requirements. Then compare an upgraded version and ask for the price difference by option. This gives you a useful decision: which changes improve the way you will use or enjoy the garage enough to justify their cost?
Some choices deserve a combined conversation. A future finished workshop may benefit from 4-foot frame spacing, vertical siding with horizontal girts, a planned insulation assembly, and the right walk-in door. A garage beside the house may place more value on roof pitch, door style, coordinated roll-up doors, and matching screw heads.
Open the Ridgeline 3D designer to explore your dimensions, openings, roof profile, lean-to ideas, and exterior colors where those options are available. Share your design and upgrade wish list with our team so we can confirm available configurations, requirements, and a written quote. Mention any detail you want even if it is not shown in the tool.
For budgeting context, see our Metal Building Cost Guide. Prices and available options vary by location, manufacturer, building configuration, and project requirements. The colored roll-up door allowance above is an approximate planning figure; your written quote establishes the actual price.


Comments